Bareroots
  • Home
  • Shop
  • About
  • Contact
  • Barri Sue Stitches Blog
  • Newsletter
  • Shop Finder
  • wholesale
  • FAQ's
share       comment      write      inspire  

Happy Spring. Happy Butterfly Days

5/22/2022

0 Comments

 
I wanted to celebrate Spring with a close up of butterfly bodies. You will also get a close up of the back of my work. 

After you try one of these little sweet butterflies, you will want to embroider them to everything. Jeans, T-shirts, and especially dishtowels. 
Things just feel happier with embroidery.

"Chase Your Dreams"  Embroidered Dishtowel pattern or kit can be found in "Embroidered Toweling" Category on this website.
Picture

Picture

Picture
Picture


First step in all dishtowel embroidery is to wash and dry your dishtowel. You will want to pre-shrink your towel before doing all the embroidery work. 
I used a cool setting for my washer water and a normal setting for dryer heat.

​After wings are done with a backstitch, I used 2 strands
of black floss for the body. I took one stitch from top to bottom of butterfly.


Then, I repeated this stitch one more time to emphasize the body.

Picture

Knot off the 2 strands. Wrap the needle around previous stitching a couple times to secure.
DO NOT CUT THE THREAD.
Next, cut only one strand off
.
Remove the cut strand from the needle.
You will use the  one strand left in the needle to make the antennae.

Check out my backside. Not perfect. But kind of neat? I do not carry strands far. If it over an inch, I cut.  I trail or wrap the thread under to carry under 1 inch away.
Leaves will be placed all around the flowers. These threads will be carried under these flowers.
Picture


Use the existing 1 strand to stitch the antennae.

Simple and sweet little butterfly finished.

Keep posted for backstitch
and French Knot Blog Posts.

Have fun.
Be colorful.
Enjoy every stitch,

Barri Sue


0 Comments

Ropin' & Stitchin - How to Stitch a Lasso

5/22/2022

1 Comment

 
Picture
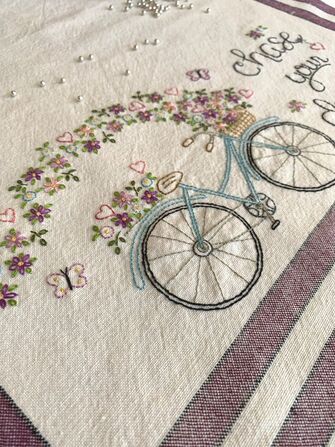
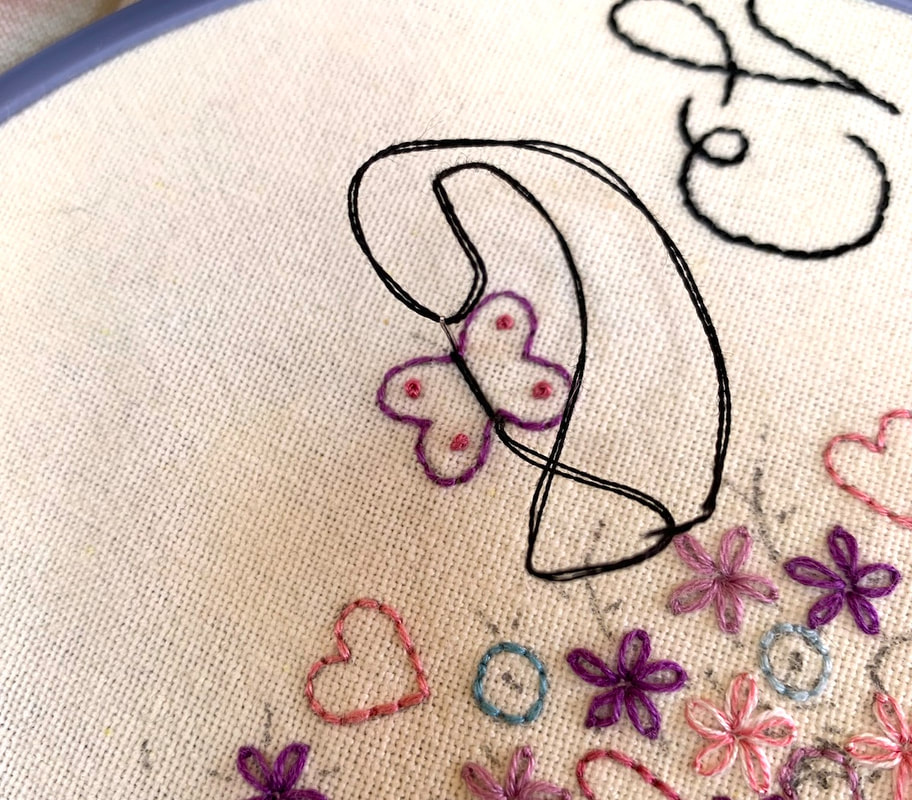
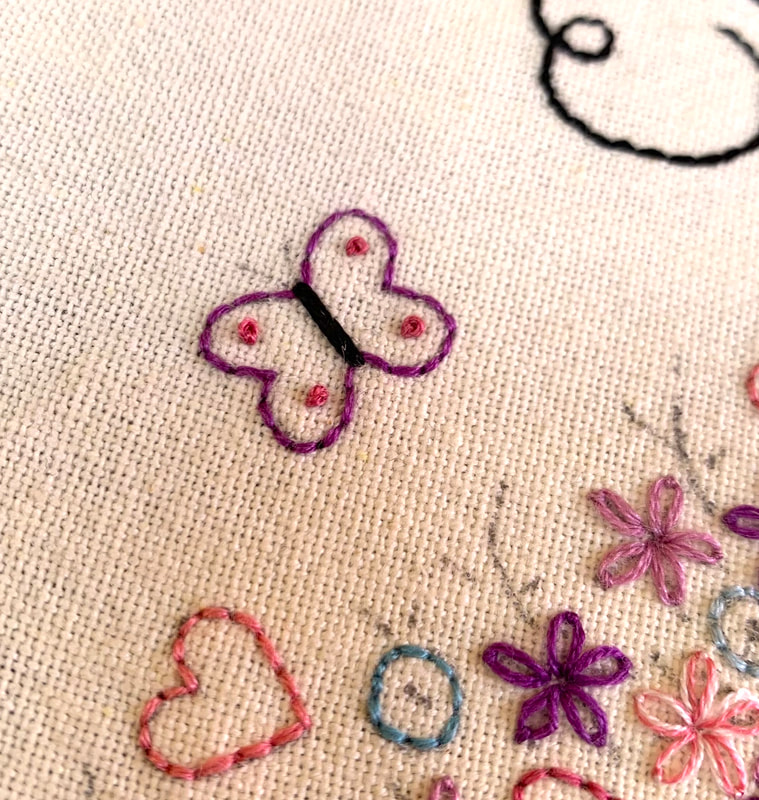
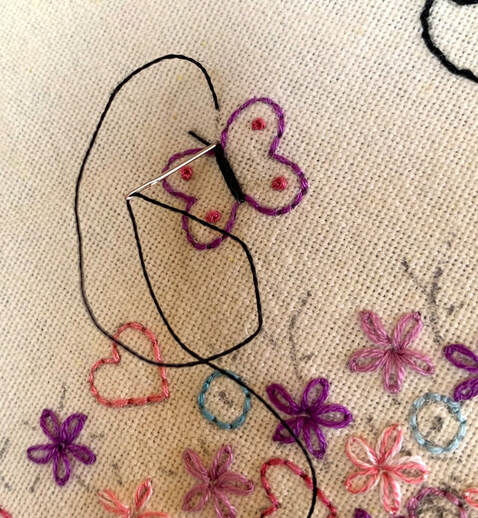
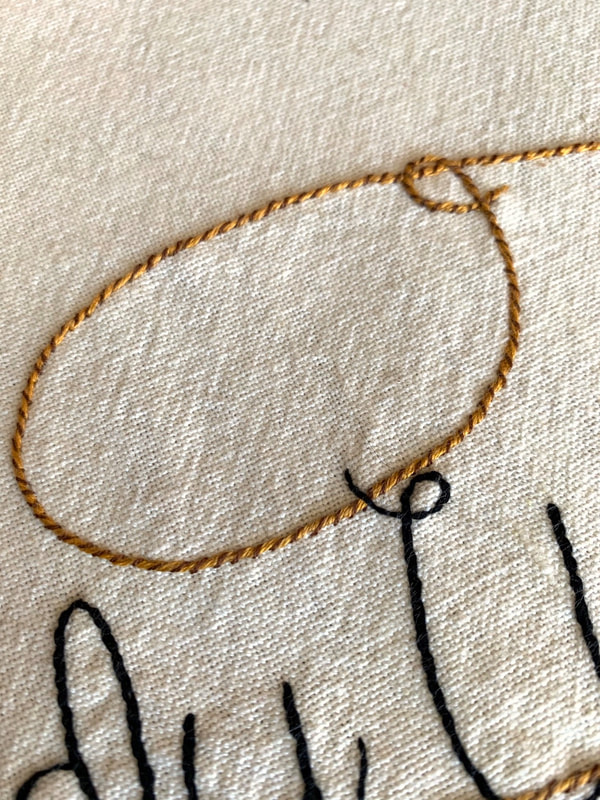
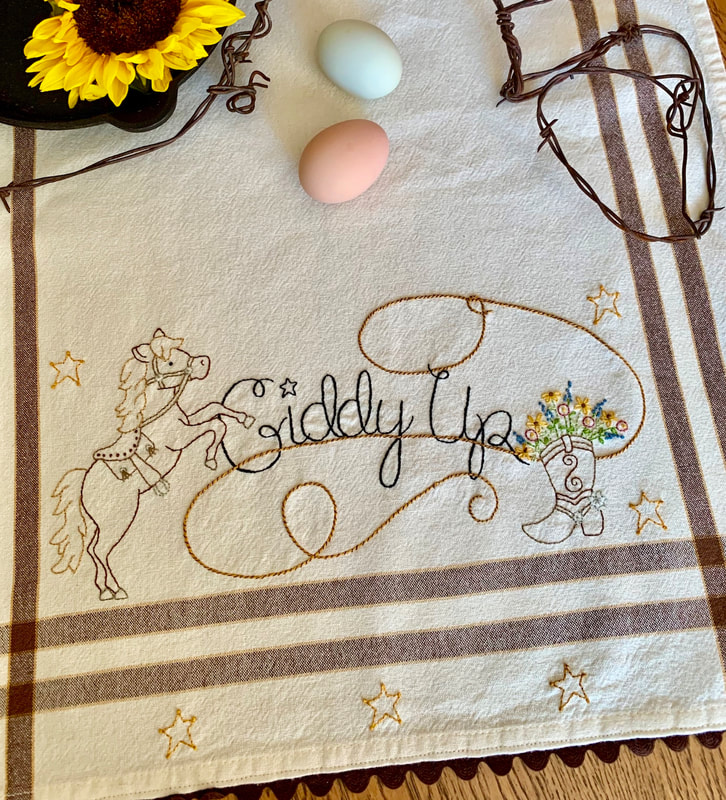
I really had a lot of fun stitching this lasso.  I hadn't stitched anything like this before. I really liked how it turned out. If you are reading this blog and want to stitch up this towel look for Giddy Up Pattern or Kit in "Embroidered Toweling" category on this website.
​Giddy up and let's start stitching.

Picture

After yellow/gold rope work is done, use 1 strand of brown floss to wrap the rope in diagonal stitches.
I always wash my towels before starting the stitching. The towel I used is 100% cotton. It will shrink a bit. You always want to wash first as the towel may shrink more than your floss will. If you skip this step, you might be left with wrinkled stitches. A sad sight after so much careful work.

I worked the lasso with an Outline
Stitch or, AKA Stem Stitch. This stitch gives a rope look as it looks like a slight twist as it is worked. You might be able to see the twist in the photo. This stitch also sits on top of the backing fabric. So it looks slightly raised. Perfect stitch for this rope. I used three strands of gold-ish/straw color. 

​I will be adding a blog about the backstitch and outline stitch in future posts.


Picture

Picture


​


Come up on one side of the rope, place your needle on the other side of the rope a slight (1/32nd) move up to achieve the diagonal wrapped look. 
Keep repeating this technique around the length of the rope.


Here is a close up of the finished lasso.
Not all perfect. Some are closer than others. Some are less diagonal than others.
I love this rustic look.


Put on your favorite jeans, your favorite music and lasso up some stitches. 

Happy Trails and 
Happy Stitches,

​Barri Sue
Picture
Darlin' Harlin. Death Valley days. 2022.
1 Comment

Carrying Threads. A View from the Backside.

5/22/2022

2 Comments

 
Picture
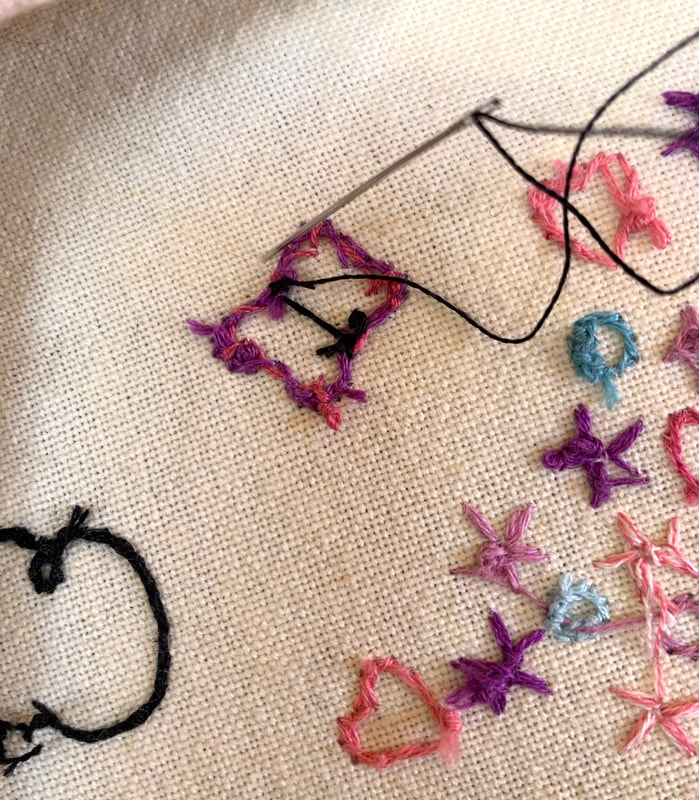
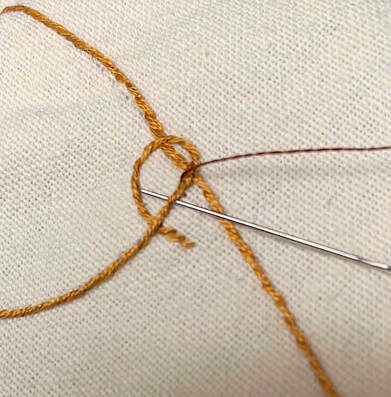
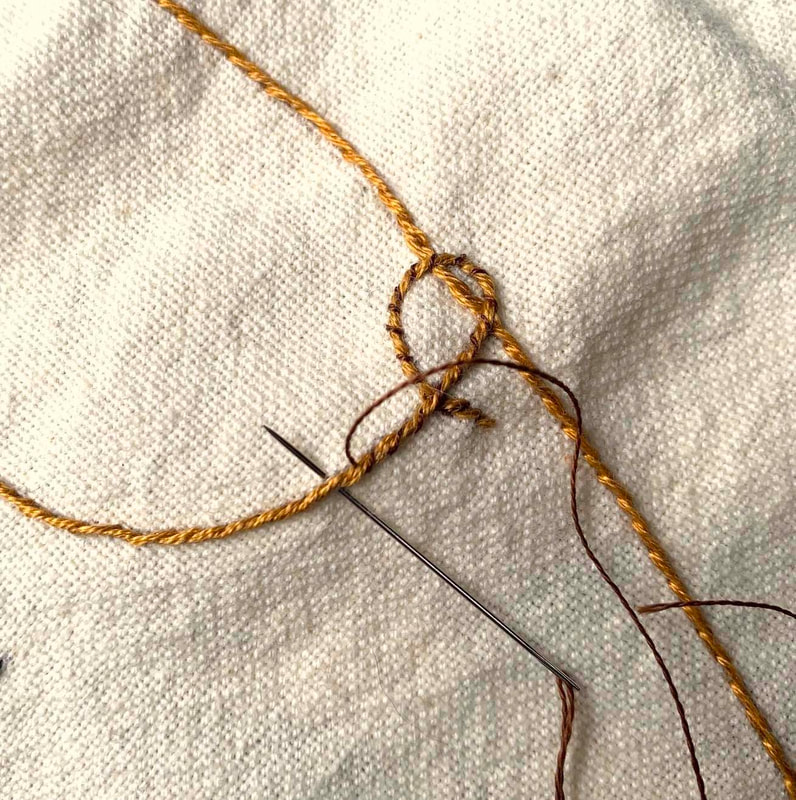
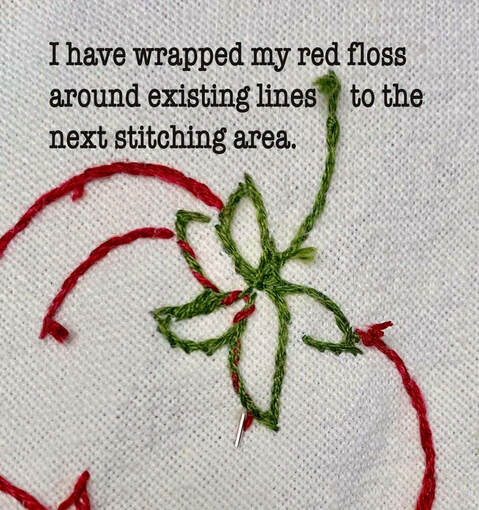
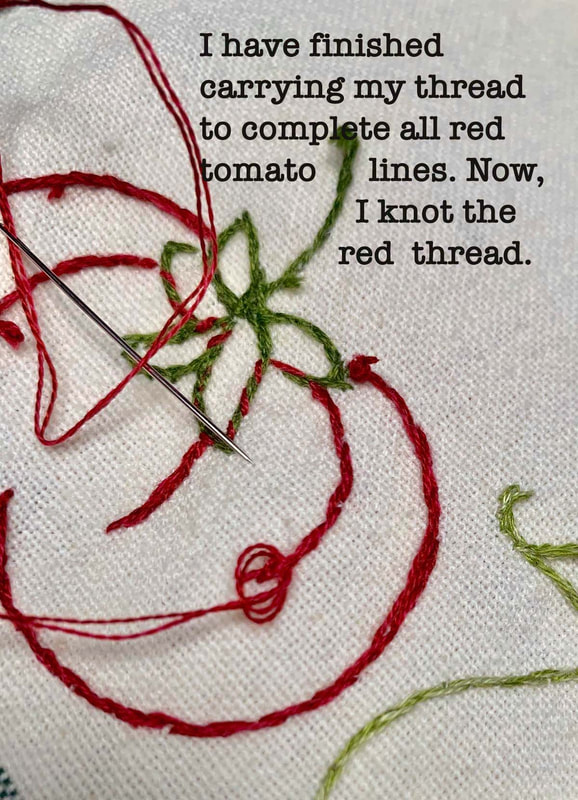
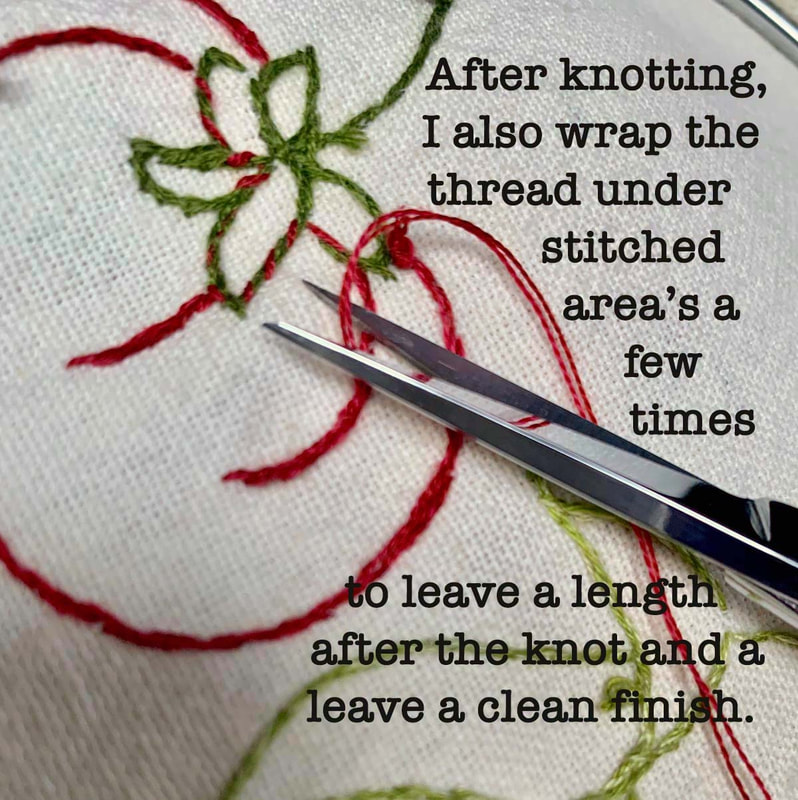
Hello from the backside!

I often get asked about how to finish the backs of my embroidered dishtowels. While I do try to make the backside neat, it is not as neat as the front. There is an old adage, "Make the back as neat as the front". Not sure how to achieve this perfection as I am self taught, but here are my tricks to carry threads and neaten up my knots.


This view is from the backside of "Farm Girl" Embroidered Dishtowel.

Picture


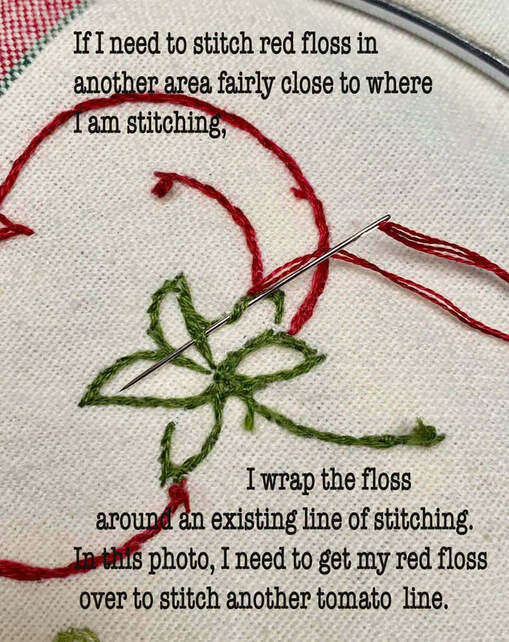
In these photo's, I am finding a path to bring my thread to the next crevice line in my stitched tomato.
I don't want to knot and start my thread again. It is only a 1 inch to my next stitching line. But, I do not want to carry the thread across the back. This causes potential pulling and looks messy.
So, I wrap around existing
lines to get where I need to go.


Picture

Picture

Picture


​ 


Now, I have wrapped my red thread around the green tomato leaf lines. I am ready to backstitch the next tomato crevice. 
After this red tomato line is finished, I wrap back around the red line and into the green leaf lines as you will see in the next photo.


Wrapped red thread to the last tomato crevice line.  Then backstitched this last line. My tomato is done.
Ready to knot the red thread off.

To knot, I wrap the and square knot the thread. Pull until just taught. 
Never pull embroidery  tight. Embroidery is meant to sit gently.


As an additional security measure, as these towels may get washed many, many times, I wrap my thread up into the backstitched line to hold.

When starting  a new thread, I have a knot at the end, after 1 or 2 stitches, I try to remember to go back and wrap that knot as well. Again, as a precaution to secure the knot.
I do sometimes get lost in my stitching and forget this step : )

Happy Stitching!
Barri Sue
2 Comments

"Farm Girl" Typewriter Lettering Stitching Tutorial

5/22/2022

2 Comments

 
Picture

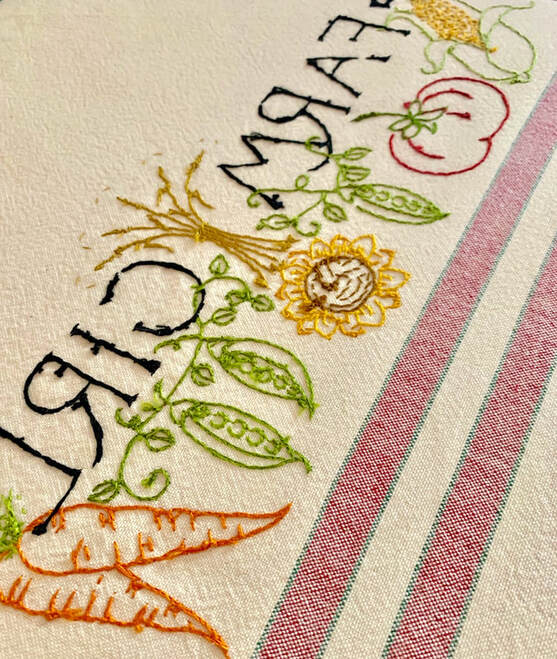
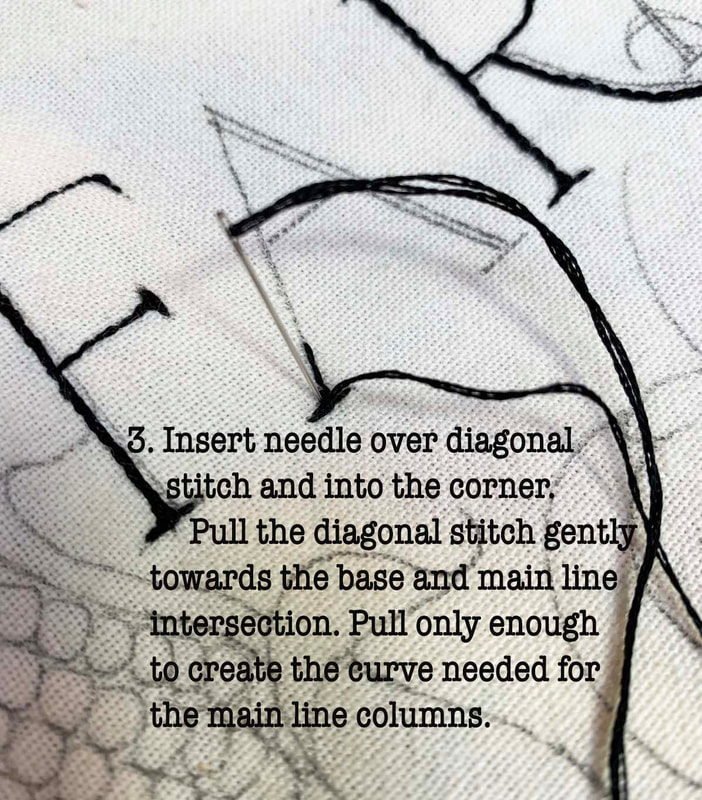
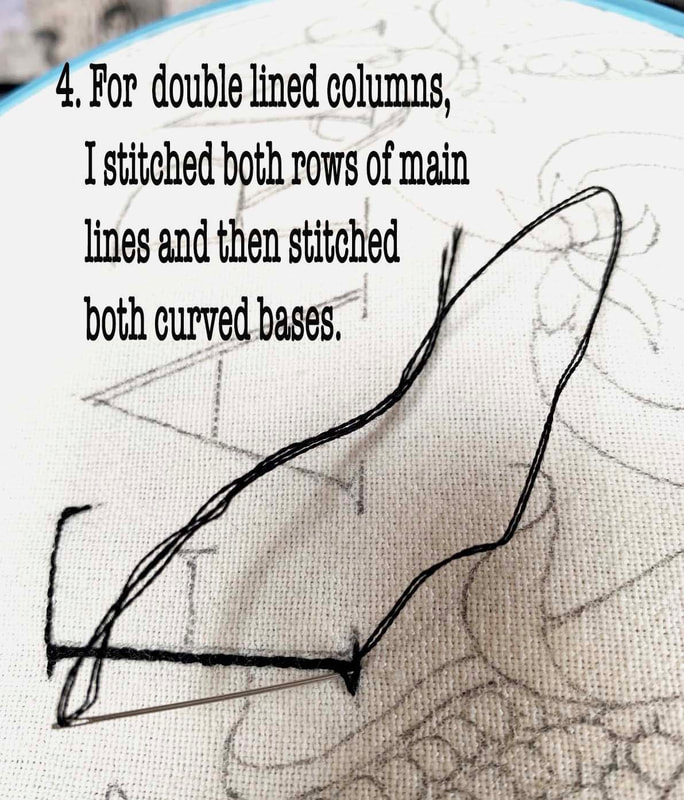
Welcome to the Farm Girl Dishtowel Lettering tutorial.
This post will give you hints for stitching American Type
style lettering. 

You may have the Farm Girl Dishtowel kit or pattern. If not, this pattern and/or kit is available to purchase from the "Embroidered Toweling"  Category on this site.
Before beginning,
Pre-wash your towel following manufacturers instructions.
I used the cool setting on my washer. 
Trace design onto your washed and pressed dishtowel. Find detailed tracing instructions on FAQ's page of this website.
                                                                   I used 2 strands of black floss and backstitch for the letters.
 

Picture


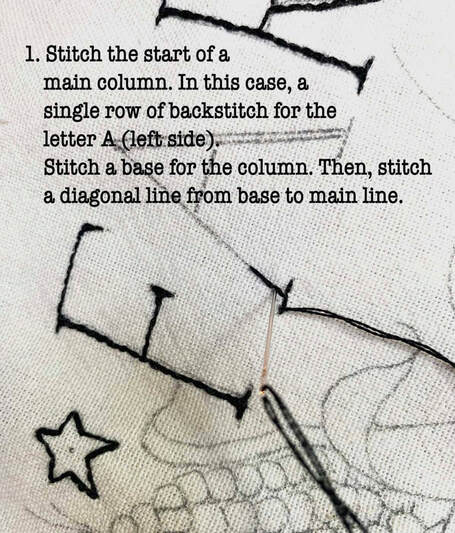
I have started my letters in this photo. You can see my tracing for a single row column and a double row column. The F is finished with a double row main column. The base's of all vertical and horizontal columns are finished. 
Note how each column does not necessarily have a base going in
each direction. For example, the top of the F only has a base going towards the left. The top horizontal column of the F only has the base pointing downward.


Picture

Picture

Picture


​Here is my little diagonal stitch. Ready to bring my needle up and over the diagonal stitch to make the bend for a classic American Typewrites base look.


​


I have brought the needle up and over the diagonal stitch. 

Insert and pull gently into a slight curve towards the base.
Classic column achieved!
Repeat for the other side of this column.


​


An example of double lined column. Same technique.
I stitch both rows first.

Have you noticed where I missed tracing the diagonal lines on the A? I am a quick tracer! In fact, I think I tried very hard to make this one complete for the photo's. I
 do not trace everything every time. When I get to the A, I will remember it needs a column when I glance at my design page.
If I wasn't tracing for photo's, I might not have made any diagonal lines.
Hope you have wonderful days ahead stitching!
​
Barri Sue
2 Comments

    Author

    Barri Sue Gaudet designer for Bareroots, stitcher, mom and grandma, friend, hiker, quilt and knitting shop owner, and now, blogger. 

    Archives
    ​

    December 2022
    July 2022
    May 2022
    April 2021
    July 2020
    March 2020
    December 2018
    March 2018
    February 2018
    December 2017
    February 2017

    Categories

    All

    RSS Feed

Proudly powered by Weebly
  • Home
  • Shop
  • About
  • Contact
  • Barri Sue Stitches Blog
  • Newsletter
  • Shop Finder
  • wholesale
  • FAQ's