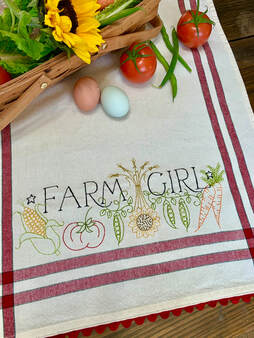
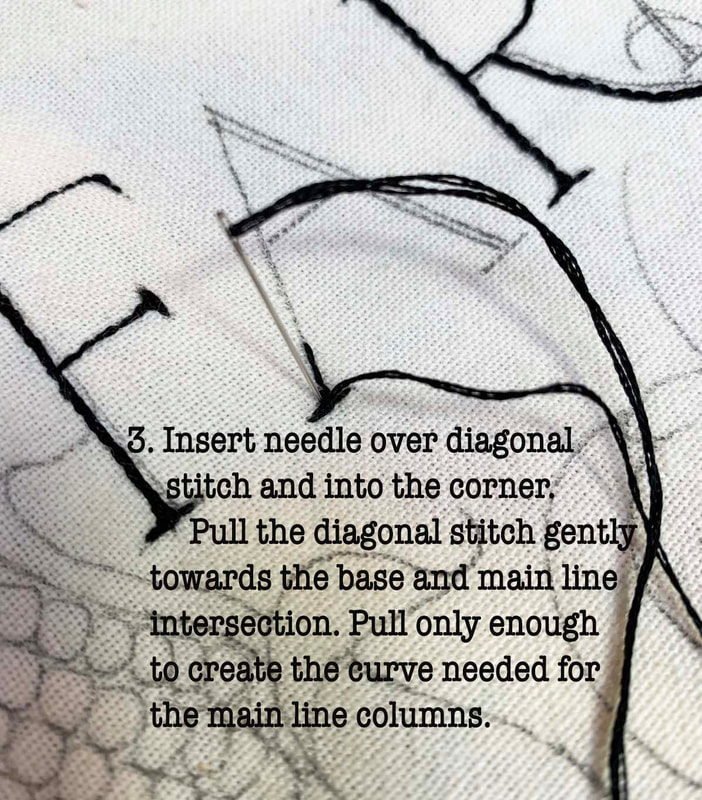
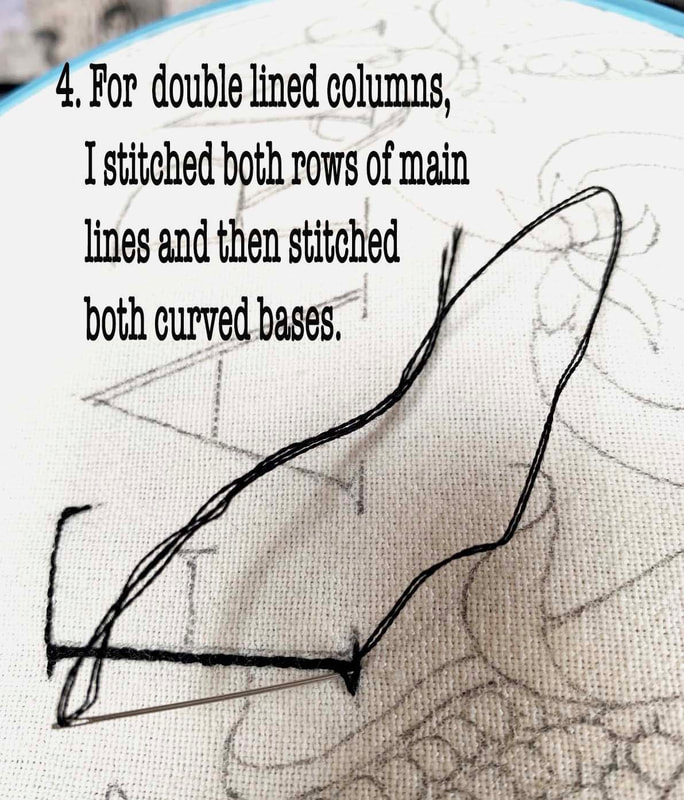
 Welcome to the Farm Girl Dishtowel Lettering tutorial. This post will give you hints for stitching American Type style lettering. You may have the Farm Girl Dishtowel kit or pattern. If not, this pattern and/or kit is available to purchase from the "Embroidered Toweling" Category on this site. Before beginning, Pre-wash your towel following manufacturers instructions. I used the cool setting on my washer. Trace design onto your washed and pressed dishtowel. Find detailed tracing instructions on FAQ's page of this website. I used 2 strands of black floss and backstitch for the letters. 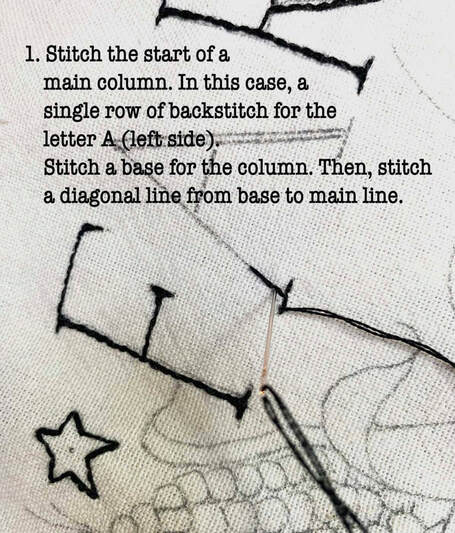 I have started my letters in this photo. You can see my tracing for a single row column and a double row column. The F is finished with a double row main column. The base's of all vertical and horizontal columns are finished. Note how each column does not necessarily have a base going in each direction. For example, the top of the F only has a base going towards the left. The top horizontal column of the F only has the base pointing downward.
0 Comments
 From time to time, we see sewing rooms, sewing organizers and creative ways stitchers, knitters, and sewers store their stash. It is always fun and creative to see the fun ways people use large sewing rooms, small dining rooms, kitchens, and closets. I started out as a young wife with a tall shelf in the corner of my bedroom. My Pfaff was on a folding table. Eventually, I would move the sewing machine to the dining room table. This worked out well for a very long time. I remember the dining room is where my mom did her sewing. We kids would be sent to bed and now I know she would stay up late sewing. In the morning there would be a dress hanging from our dining room overhead light. I remember a particular dress very well. It was blue velveteen with chiffon sleeves. And it was for me. I had picked it out of the Simplicity or Butterick book and it was my dress for the first day of school. By far the prettiest dress I ever had until my Prom days. By 15 years old, I was making my own dresses. 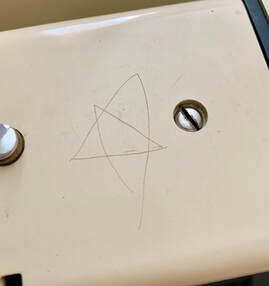 When I left home at 19, my mom bought me my own Pfaff. It is still in my use. I will never give this machine up. Still good for repairs to Carrhart jeans and snow clothes for my boys and their friends. Still sews through just about anything. There are sweet stars carved into it by my son Eric when he discovered pins made great lines into the enamel. I like to think the stars were for me but, I think he just discovered how to make five-pointed stars around the same time as playing with my pins. He used to stand by my machine and ask me to tell stories for hours. A very sweet memory. 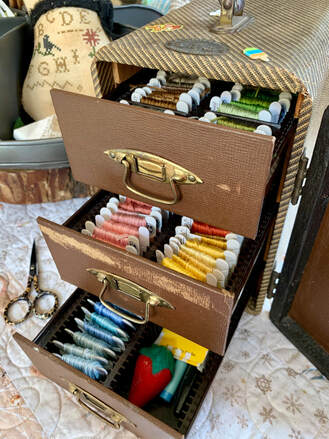 Where I keep my floss is a special story. I was going to try to sell my little patterns at a retail sewing show (around 1996?) in Phoenix, AZ. I was single and trying to support myself and my boys. I was going to meet my friend Kathy Campbell of Heart to Hand there with her husband. She asked for my cell number. I didn't have a cell phone I told her. (I couldn't afford one.) She and her husband Bill, insisted I drive and follow them the whole way. That I would never be alone. I received so much help from them during this trip. I will never forget it.
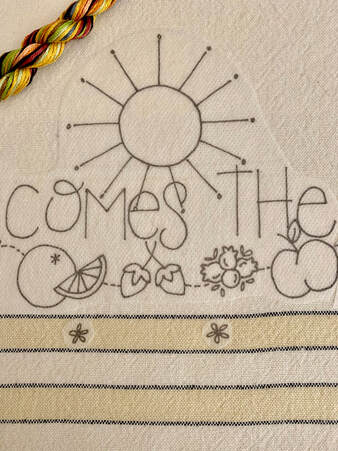
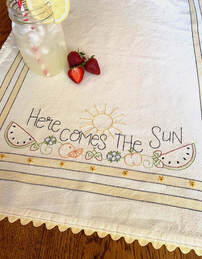
The show was fun and successful. We left Phoenix and to an Antique Mall Kathy liked to visit. She has the best flair for design in everything! I found a little slide case. I loved it and wanted it for what? Kathy said, embroidery floss bobbins! This is exactly what it became. This little slide projector case makes me feels creative and loved. It has been with me for 25 years. Now, it is opened, sticker decorated, teaching colors and carefully petted by my "Darling" Harlin granddaughter. And I finally received a cell phone. An amazing gift from a caring friend. As if the things we make aren't memories enough, sometimes the items we use to make these memories keep our hearts full. 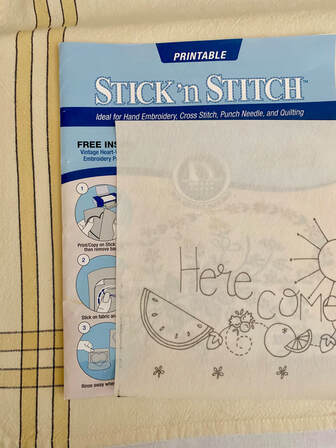 Hello To All Embroiders! I added a new product to the "Favorite Notions" category. Stick N' Stitch by Sulky. Some of you find tracing designs to fabric difficult. This transfer paper will eliminates tracing! I am using Here Comes the Sun Embroidered Dishtowel pattern as an example. This towel is available as a kit in the "Embroidered Dishtowels" Category of the site. Use an inkjet printer copy your embroidery design to the sticky transfer paper. Cut away any excess Stick n' Stitch. Have projects you are waiting to start? Add these to your printer area. Try to use up the whole surface of one 8.5 x 11 sheet. You can cut away and stick the designs in order on your fabric.
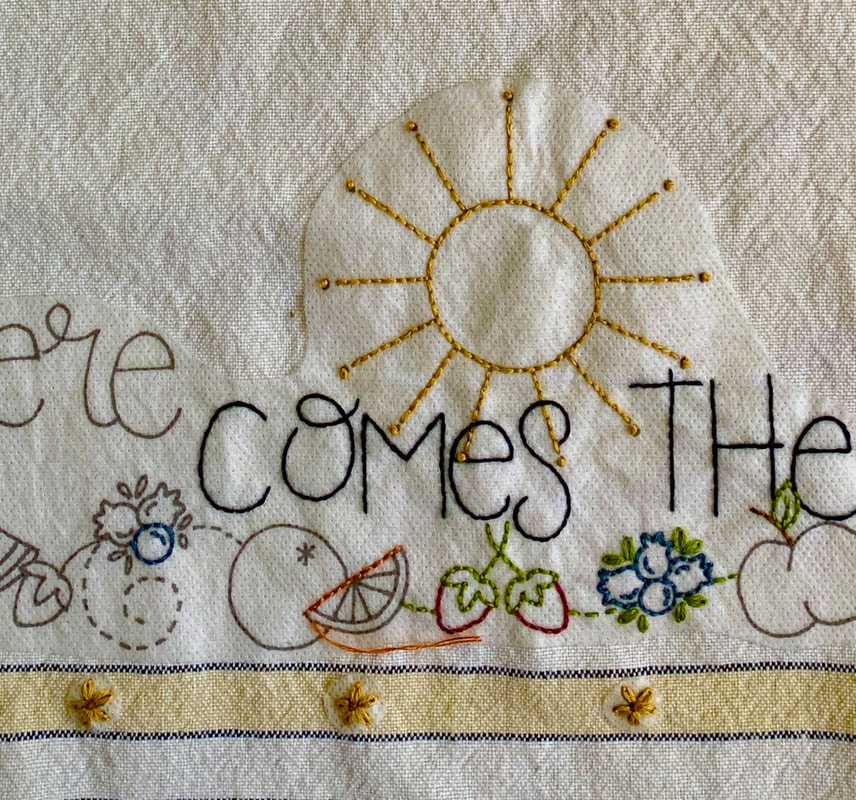
Embroider through fabric and paper. I found it helpful to anchor the ends of Stick n' Stitch so no accidental lifting occurred. I did this by doing my embroidery stitches on both ends of the design. And see where the little flowers are there by themselves? I stitched those up at the beginning so I did not accidentally lose them when I packed up my stitching to take along with me.
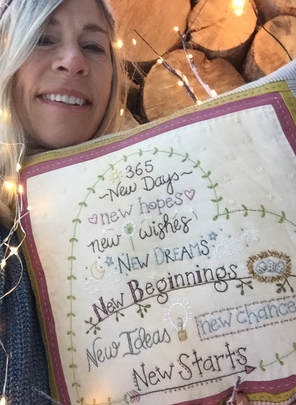
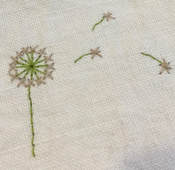 So excited about sewing! There doesn't seem to be enough time in the day for all my hands want to get done. My vow to fall in love with sewing was just what my heart needed! This and a precious granddaughter! For those of you who follow on my social media sites, I hope you enjoy my indulgence of posting a pic or two, or three, or four! The site has a new category: Embroidered toweling. Love doing these. Valentine themed towel is currently in a hoop right now. My New Year resolutions have already begun. Number 1. I have a nice white linen skirt and I am going to embroider a flower, bee, heart, leaf (more like 400 of those probably!) a little bit of whatever I am working on through out the year. I started with this cute dandelion. At the end, I hope to have a beautiful little bit of 2019 to wear proudly. Number 2. Get to this blog more often! One down! I hope you find coming to this site fun and always click on something that inspires you! Bust out that needle and thread! Download the New year Stitchery. I am going to make sure 2019 is going to be stitching year! Happy Stitching Throughout the Year ! Barri Sue Gaudet
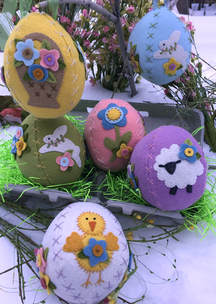
I love getting comments and emails from all of you. Often, they are questions on how to do techniques. So, I have decided to add some how-to's to my blog. Today, it will be Sweet Stitched Easter Eggs! These sweet eggs are fun and easy! Follow here, and I hope you learn something new!
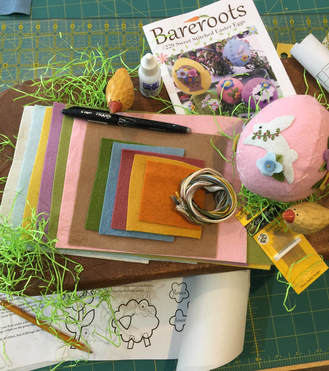
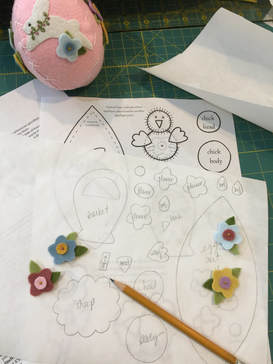 Step Two. Trace all the motifs onto freezer paper. Trace on the dull side of freezer paper with a pencil. Each freezer paper template can be reused up to five or six times so trace extra egg shapes, leaves, and flowers. One each of the motifs (lamb, chick...) will be enough for all the eggs. 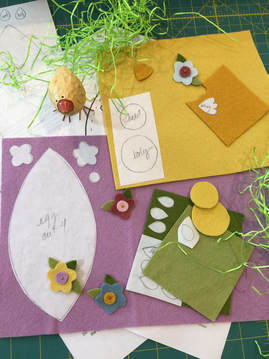 Step Three. Press the freezer paper templates. Rough cut the freezer paper templates out and place onto corresponding wool felt colors with the shiny side down. Press with a hot, dry iron. Cut out on the traced line. Peel freezer paper off the cut out wool felt piece. Reuse the freezer paper template to cut out more egg shapes, flowers and leaves. One wonderful advantage of wool felt and felted wool appliqué is the you can use either side of the wool! This means, I only need to trace one chick wing and I can cut two wings and flip either one to face which ever direction I need! 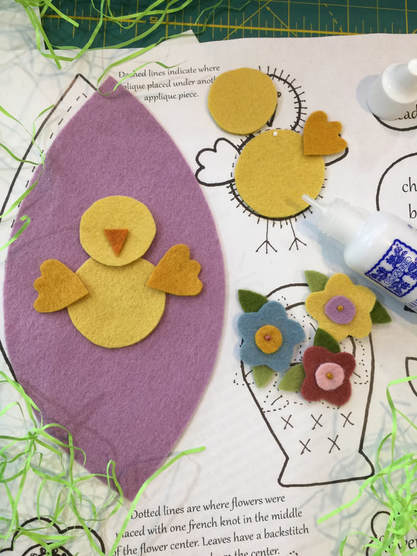 Step Four. Glue motifs to egg shapes. You need four egg petal shapes for each egg. So there are four sides. I put a flower cluster on opposite sides of the egg and a motif on opposite sides. You can change this up of course! This will be in the example used. In this post, I will be making a chick egg. One great hint I can share here is shown in the example. I always include the finished design in my pattern pages. This way, you can use this pattern page to build your chick or lamb. Put your pattern page right onto your ironing board. Then I put the body of the chick on the pattern page, then I add a small dot of glue where the head and wing will overlap. Place these shapes onto the body matching the outside edges of the head and wings from the pattern page. Then I hit them with the iron to help dry the glue. At this point, I scoot them of the pattern page and build another chick in the same manner. After the second chick is done, I can pick up a whole chick turn it over add a couple spots of glue and place it on the egg shape. Let the glue dry before starting step five. 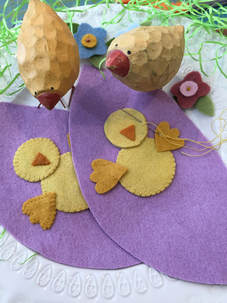 Step Five. Whipstitching. I whipstitch all the motifs in place. I use one strand of floss that matches the wool color I am going to sew in place. I do not do a blanket stitch. You can if you want but it is not necessary. I let the pretty wool felts or wools be the star and delicate light whipstitch holds them on. In each pattern is an example of how to do the whipstitch. Note: On this pattern I do not whipstitch the flowers or leaves. They are held on with french knots and backstitches. See the next step... 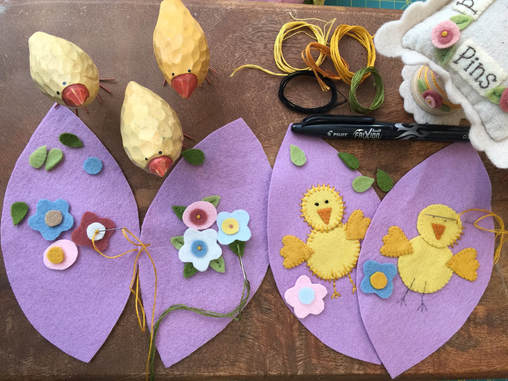 Step Six. Embroidery. I use three strand of floss for most of my embroidery work on wool felts. The wool felts or wools tend to absorb the stitches so I use more strands and do not pull too tightly so my stitches stay on top of the wool. Most embroidery on the wool felts is simple. So I recommend drawing your embroidery lines by your own hand. No need to trace. If you use a removable pen ( Frixion - heat removable or, blue water removable pens) you can take your bad lines off and re-do! The flowers all get a french knot in the center to hold them down The french knot is three strands and I wrap the needle three times to make a significant knot for the center of each flower. The leaves are backstitched veins holding them on. Just tuck a leaf under the flower and back stitch in place with three strands of green floss. Eyes on my little characters are three stranded french knots in black floss but only two wraps of the needle. The eyes tend to get leaning if there are two many wraps. I like my eyes to be tight little perfect knots. When embroidery is done, remove your guide lines.
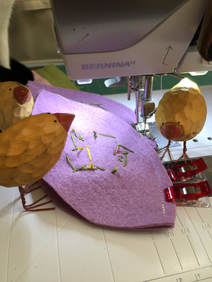
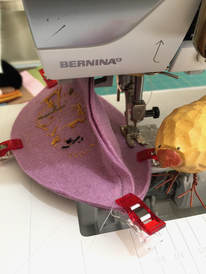
Step Seven. Sewing. Here you get to see my messy backs! I do not worry about it. It is all inside on the step 8! Now, lay two egg shapes right sides together. Clip or pin to hold in place. A flower cluster shape on top of a chick shape. Starting 1/4 inch from the top, sew along the right side only. Stop 1/4 inch from the bottom. Repeat for the next two egg shapes. Open up your joined halves. Place right sides together and clip or pin. Make sure your tops match at the joined seams. I had one seam going to the right and one seam going to the left to minimize bulk. Sew around leaving an opening for turning and stuffing on one side only at the point shown on the pattern page. 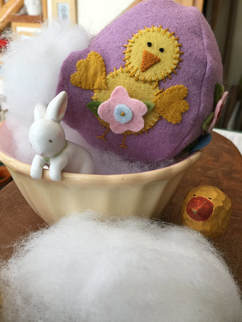 Step Eight. Turn and stuff. Turn your egg inside out. Being careful not to catch embroidery threads and pulling on them. I always check before stuffing in case I have pulled on a french knot and it needs a little touch up! Stuff with small bundles of stuffing at a time. While stuffing, I am kind of shaping the egg as I go. When you have sufficient stuffing, Turn the raw edges into the stuffing and sew closed by hand with a single strand of matching floss. 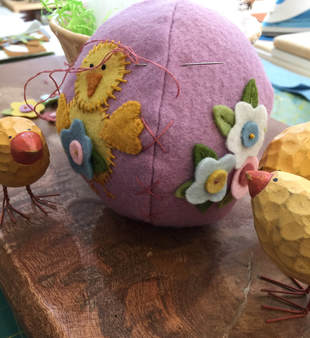 Step Nine. Finishing.
With two strands of floss I made big X's down the side seams. I thought it gave fun little extra stitches. You can make it more fun with crazy stitches going down the sides! I hope these eggs make you smile and reading this helps you feel confident to create and fill your home with sweet spring things! Happy Stitching, Barri Sue |
AuthorBarri Sue Gaudet designer for Bareroots, stitcher, mom and grandma, friend, hiker, quilt and knitting shop owner, and now, blogger. Archives
|

 RSS Feed